
angular custom event binding
Currently enrolled in Udemy’s- the complete guide to angular 2. Notes from Lesson 5
Output (Event) Binding
-
enables the parent to listen for child events that is emitted (
EventEmitter) via output properties denoted by@Output()decorator - in the below example, when we toggle the ‘Is Child Crying? button, it will display the name of the child and whether or not it is crying.
-
The parent binds to the event
childrenCryingand when the event is invoked, the@Outputdecorator in theChildComponentnamedchildrenCryingemits a notification to the parent. The parent then invokes theonChildrenCrying($event)event handler.child.component.ts
  @Component({
    selector: 'app-child',
    template:
    `
      <button
      class="btn btn-primary"
      (click)="toggleChildCrying()">Is Child Crying?</button>
    `
  })

  export class ChildComponent implements OnInit {
    @Output() public childrenCrying = new EventEmitter<{name: string, cryingStatus: string}>();

    public children: {}[] = [];
    public cryingStatus: string = 'not crying';

    constructor() { }

    ngOnInit() {
    }

    toggleChildCrying() {
      this.cryingStatus = this.cryingStatus == 'not crying' ? 'crying' : 'not crying'
      this.childrenCrying.emit({
        name: 'lola',
        cryingStatus: this.cryingStatus
      });
    }
  }
parent.component.ts
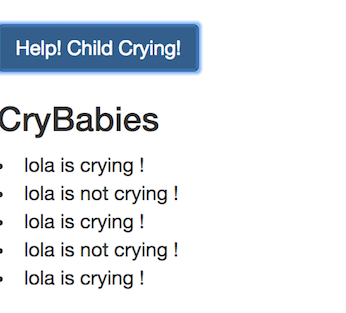
  @Component({
    selector: 'app-parent',
    template:
    `
      <app-child
        (childrenCrying)="onChildrenCrying($event)">
      </app-child>

      <h3> CryBabies </h3>

      <li *ngFor="let child of childrenCryingList">{{ child.name }} is {{ child.cryingStatus }} !</li>

    `
  })

  export class ParentComponent implements OnInit {
    public childrenCryingList = [];

    constructor() { }

    ngOnInit() {
    }
    onChildrenCrying(child: {name: string, cryingStatus: string}) {
      this.childrenCryingList.push({name: child.name, cryingStatus: child.cryingStatus});
    }
  }
the above code displays:
Custom Event Binding
-
if you don’t want to expose the property of the event that you are binding to, you can also use the
@Outputdecorator and use the output alias. -
for example, referencing the same sample code above, in the child component, you can give the
childrenCryingevent emitter a named output decorator calledcryingEvent. Thus in the parent component you bind to that event via the new name, which allows you to expose the property from the child component.
child.component.ts
  export class ChildComponent implements OnInit {
    @Output('cryingEvent') public childrenCrying = new EventEmitter<{name: string, cryingStatus: string}>();
parent.component.ts
@Component({ selector: 'app-parent', template: ` <app-child (cryingEvent)="onChildrenCrying($event)"> </app-child> <h3> CryBabies </h3> <li *ngFor="let child of childrenCryingList"> is !</li> ` }) -
Til next time,
lovelejess
at 10:13
